 Setting up and mic’ing drums in the studio can be a depressing experience if things don’t go well. Here are a few pointers on how to prep your kit for the studio.
First, a great live kit may not make a great studio kit. Most drummers have one kit which they have refined for live shows. This includes head choices that may not work in a studio environment. If you plan on using your live kit for the studio, before you buy heads, check the shells for cracks or breaks. Check the hardware for rattles and buzzes. If the shells are damaged there is no use bringing them to the studio. I had a session where the bass drum shell was cracked on the bottom. The roadie had dropped the drum somehow and failed to fess up about it. The drum couldn’t be tuned and buzzed with each hit. I replaced it and two of the toms that were suspect. Something seriously bad happened to this kit. When checking the shells, don’t do it in your living room with the CD player blasting away. You need a quiet room, not too live, and a couple of towels. With the heads on, just hold the drum and hit it. Listen closely for hums, buzzes and rattles. If you hear something, try to isolate the source. Could it be loose screws inside the drum? On vintage drums, the plys may come unglued over time or the wrap can become unglued. These buzzes can be very hard to find. For live shows it may be fine but the studio is a super quiet environment; you will hear flaws. Newer drums have excellent shells so this is not as problematic. The lug casings in older drums may ring. This is caused by the spring inside vibrating sympathetically with the shell and is easily fixed by removing the casing and filling it with cotton. Again, modern lug casings usually have this problem solved.
If the drum passes the stick hit test, get your felt bass drum beater and hit the shell while again holding the drum. This low frequency impact may reveal other noises that a head hit won’t reveal. If you have successfully found that all your drums are mechanically sound, then it’s time to buy heads. If you can’t isolate the problem, then you may need to borrow or rent a kit. Check to see if the studio has a kit but beware; make sure they know drums.
When you get heads, get bottom heads as well. Even though you don’t hit them they still go ‘dead”. Just consider this studio prep as an annual overhaul and cleaning. Don’t talk yourself out of bottom heads. When you strip the drums of their heads, carefully check the bearing edges for damage. The drum should be round (duh!), the bearings straight without chips or dents and flat. You can check this by placing the drum on a glass table. Place a light inside and if you see light escape, the bearing edges aren’t perfectly flat. If they need repair, don’t attempt to do this yourself. Get the drum to an experienced drum tech.
So the drums have passed all inspections, found to be perfect and now it’s time to put the heads on. Head type and tuning I’ll leave to another post, but one thing I want to discuss is seating. Head seating allows the head and the bearing edge to ‘seat’ properly against one another. To do this properly, put the head on, thumb tighten, then put the drum on the floor with the towel under it (protect those bearing edges) and press as hard as you can down on the center of the drum. I’ve heard of some standing on the drum. Don’t worry, the head won’t pull loose from the rim. All the cracking you hear is just glue snapping. Next, crank the head tight. Press hard again. Since you are doing this the night before your session (you are, aren’t you?) don’t tune the drum yet, you can do that at the studio.
Sometimes irregular bearing edges can be helped by a light rubbing with surfboard wax. Nothing heavy, just a light touch to make a better seal with the head.
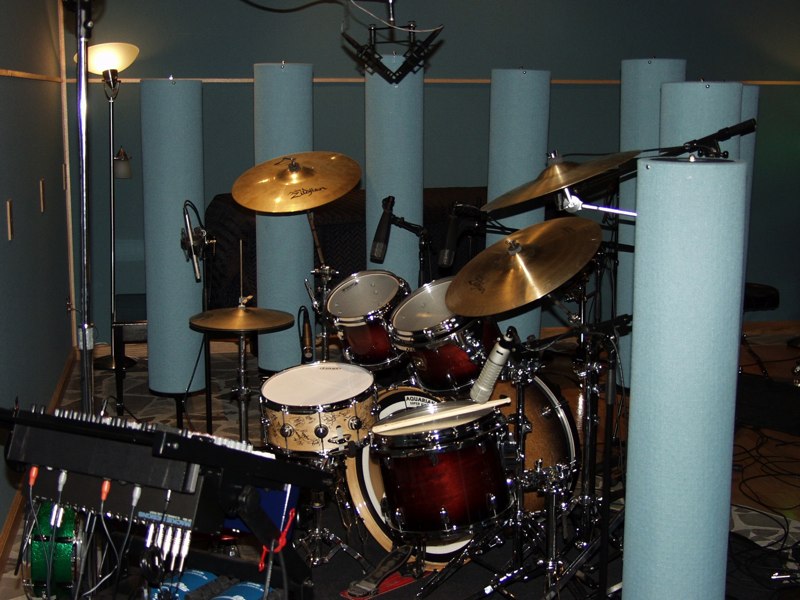
Next, check stands and hardware for rattles. Sometimes, when the tubes are not fully extended, they rattle when the cymbal is hit. Make sure you have all the felts. Any mechanical noise you hear will be huge when close mic’ed. Check the pedals and oil if squeaky. If you use a cage, borrow enough stands to separate the cymbals from the drums. Sympathetic vibrations will just make extraneous noises. Cages are fine live, problematic in the studio. I also don’t like stands that hold both drums and cymbals. They are great for live, but in the studio one stand per instrument.
Check your cymbals too. Hairline cracks are sometimes difficult to see in the grooves. If the cymbal doesn’t have a pure tone, check them carefully. Some feel that dirty cymbals darken them and make a desirable tone. Others feel clean cymbals are clear with clean overtones. There is no right or wrong here.
Now, the beater. Most drummers want a huge, powerful, low-sounding kick with plenty of attack and rich lows. So they have a 22” or 24” kick with the latest “power-head-deadening-gimmick” drumhead and a thin, plastic girly-beater. These same drummers detest plastic-tipped drumsticks but readily will use a plastic beater on the one drum that needs to be the biggest sounding in the kit (or world, they hope). Swap that silly beater with a hard felt or wooden beater and, kaboom, there’s a kick. And guess what? Wooden beater equals big lows and sharp attack…a lot less EQ needed in the mix. What? You can’t play double bass with those heavy beaters? Come on. Be a man. Grow up and get some chops.
Related Links
Tags: drums